
Guide: Importing and Applying eSUN Filament Profiles in Bambu Studio & Creality Print
🎛️ Guide: Importing and Applying eSUN Filament Profiles in Bambu Studio & Creality Print
This guide explains how to download, import, and apply eSUN filament profile files for:
- Bambu Lab printers via Bambu Studio
- Creality printers via Creality Print
Step 1: Download the Profile File and Extract It
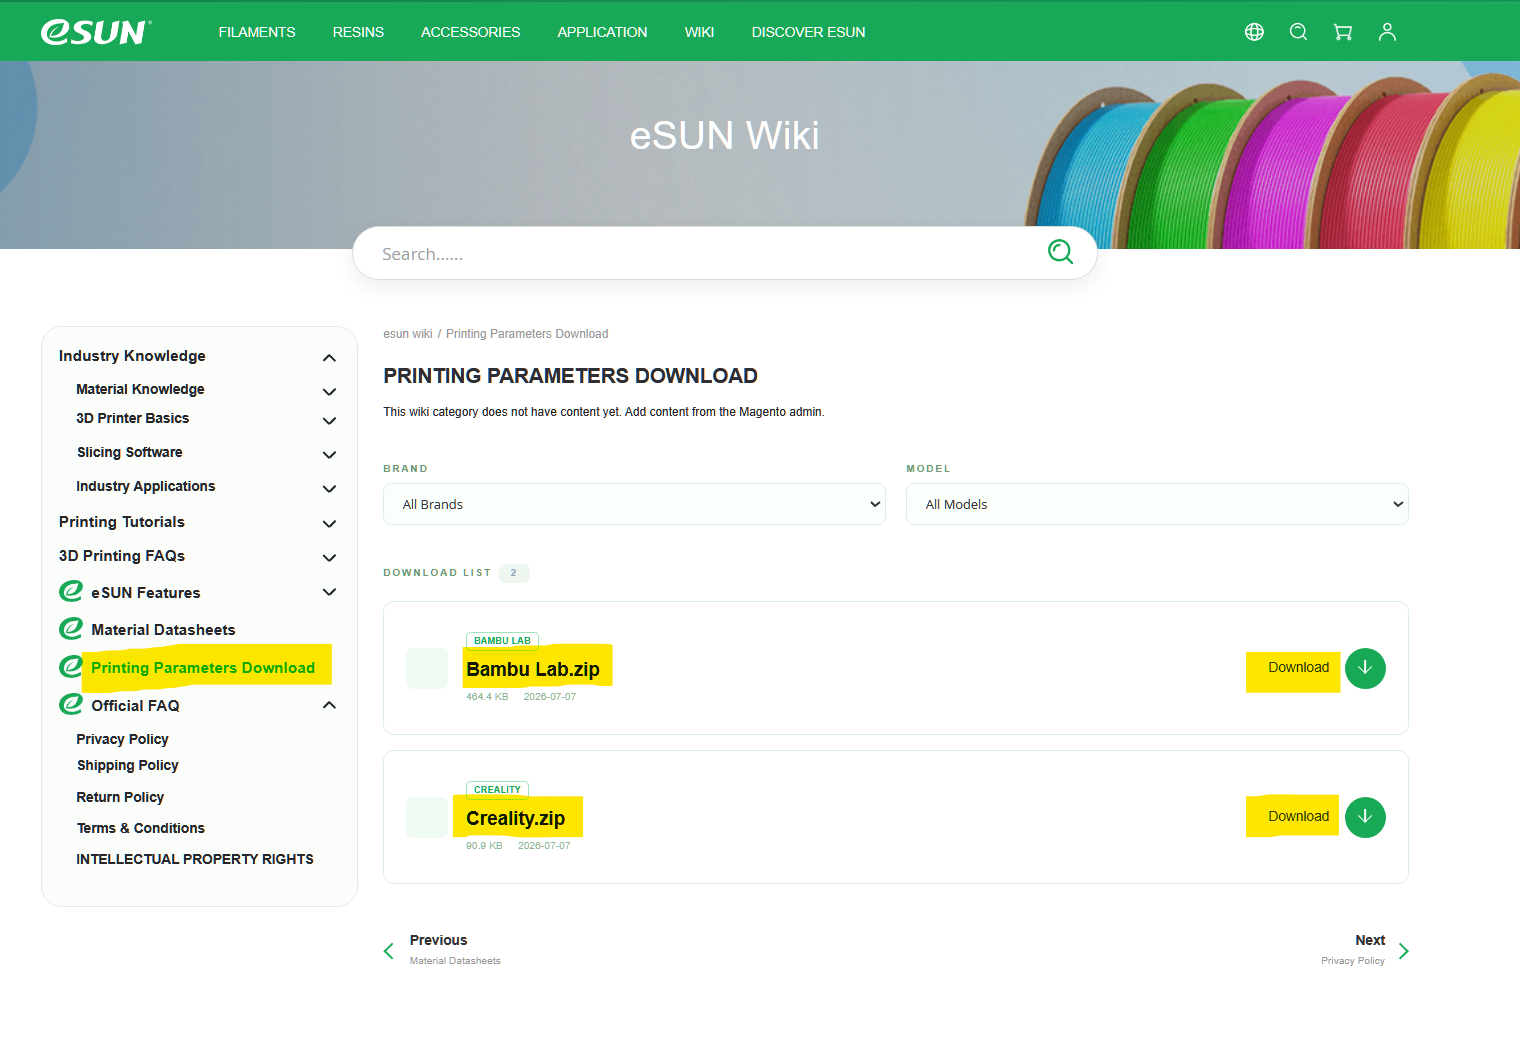
- Download the profile file from the official eSUN website
- 🔗(here).
- Click the Download button next to: eSUN Filament Printing Parameters for Bambu Lab OR Creality Print.
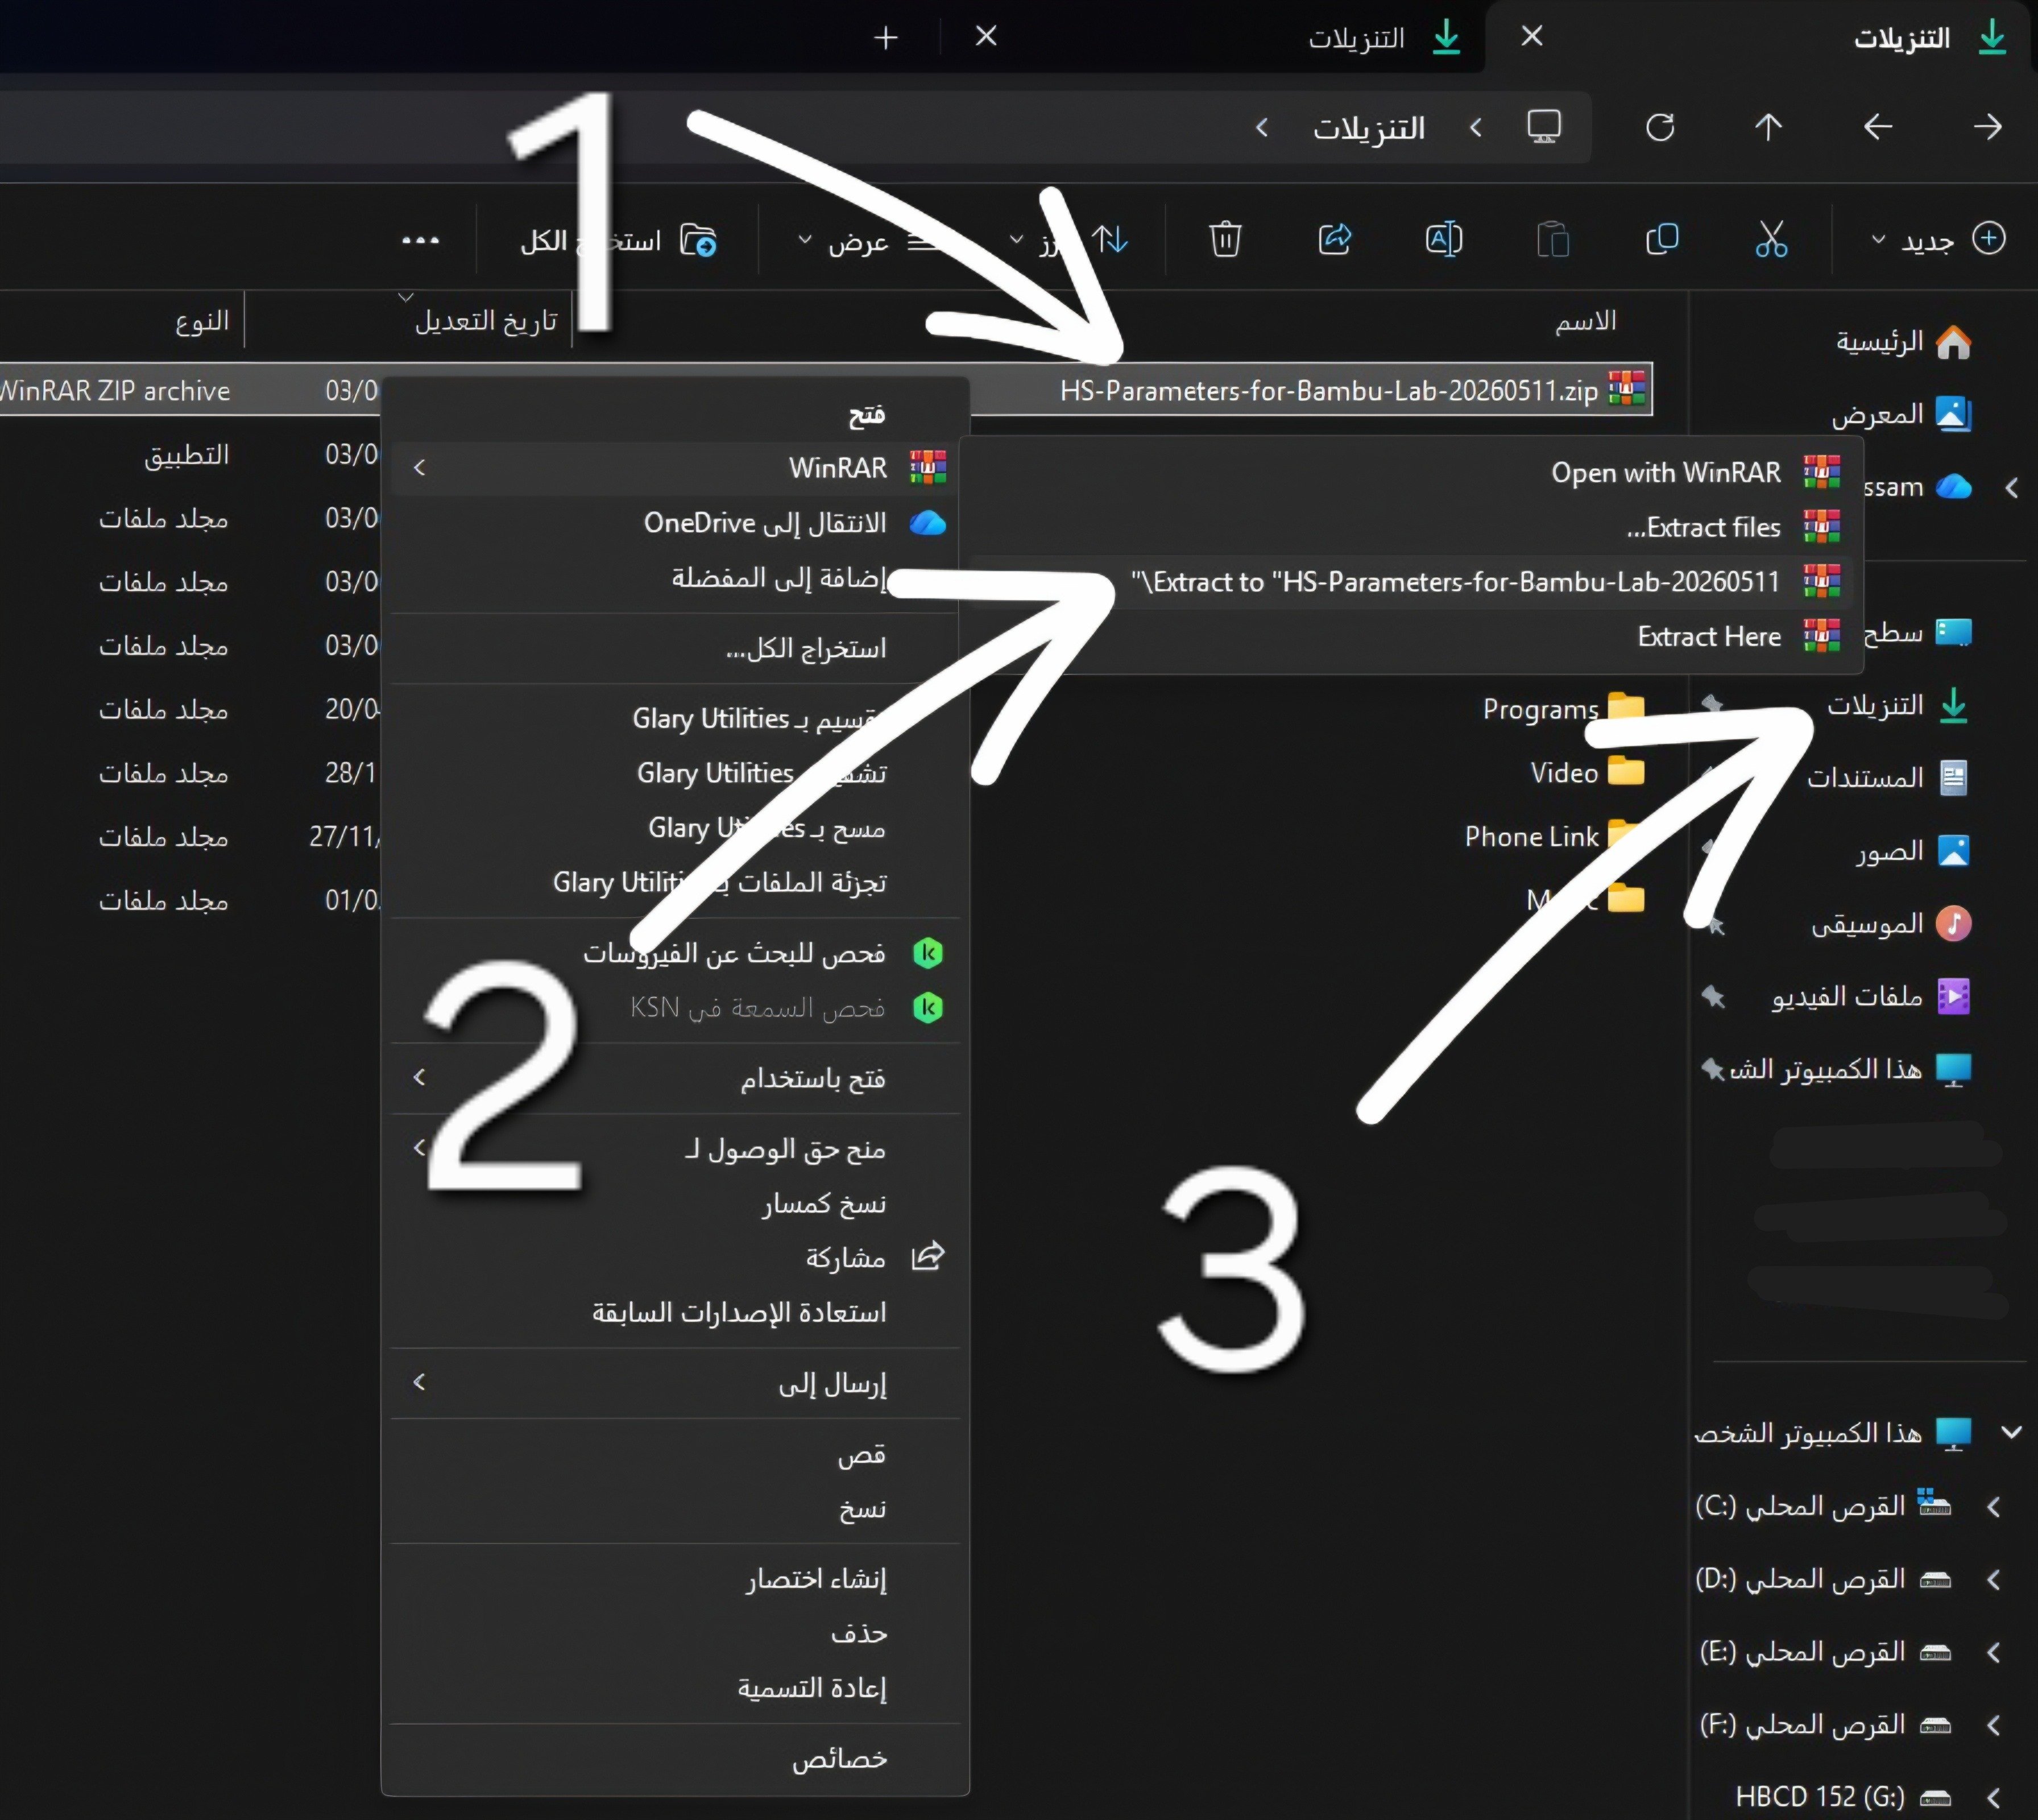
- Extract the file: Go to your Downloads folder, right‑click the compressed file, and choose Extract Here or Extract to….
Step 2: Import Profiles into Bambu Studio
Open the Import Menu
1.Launch Bambu Studio.
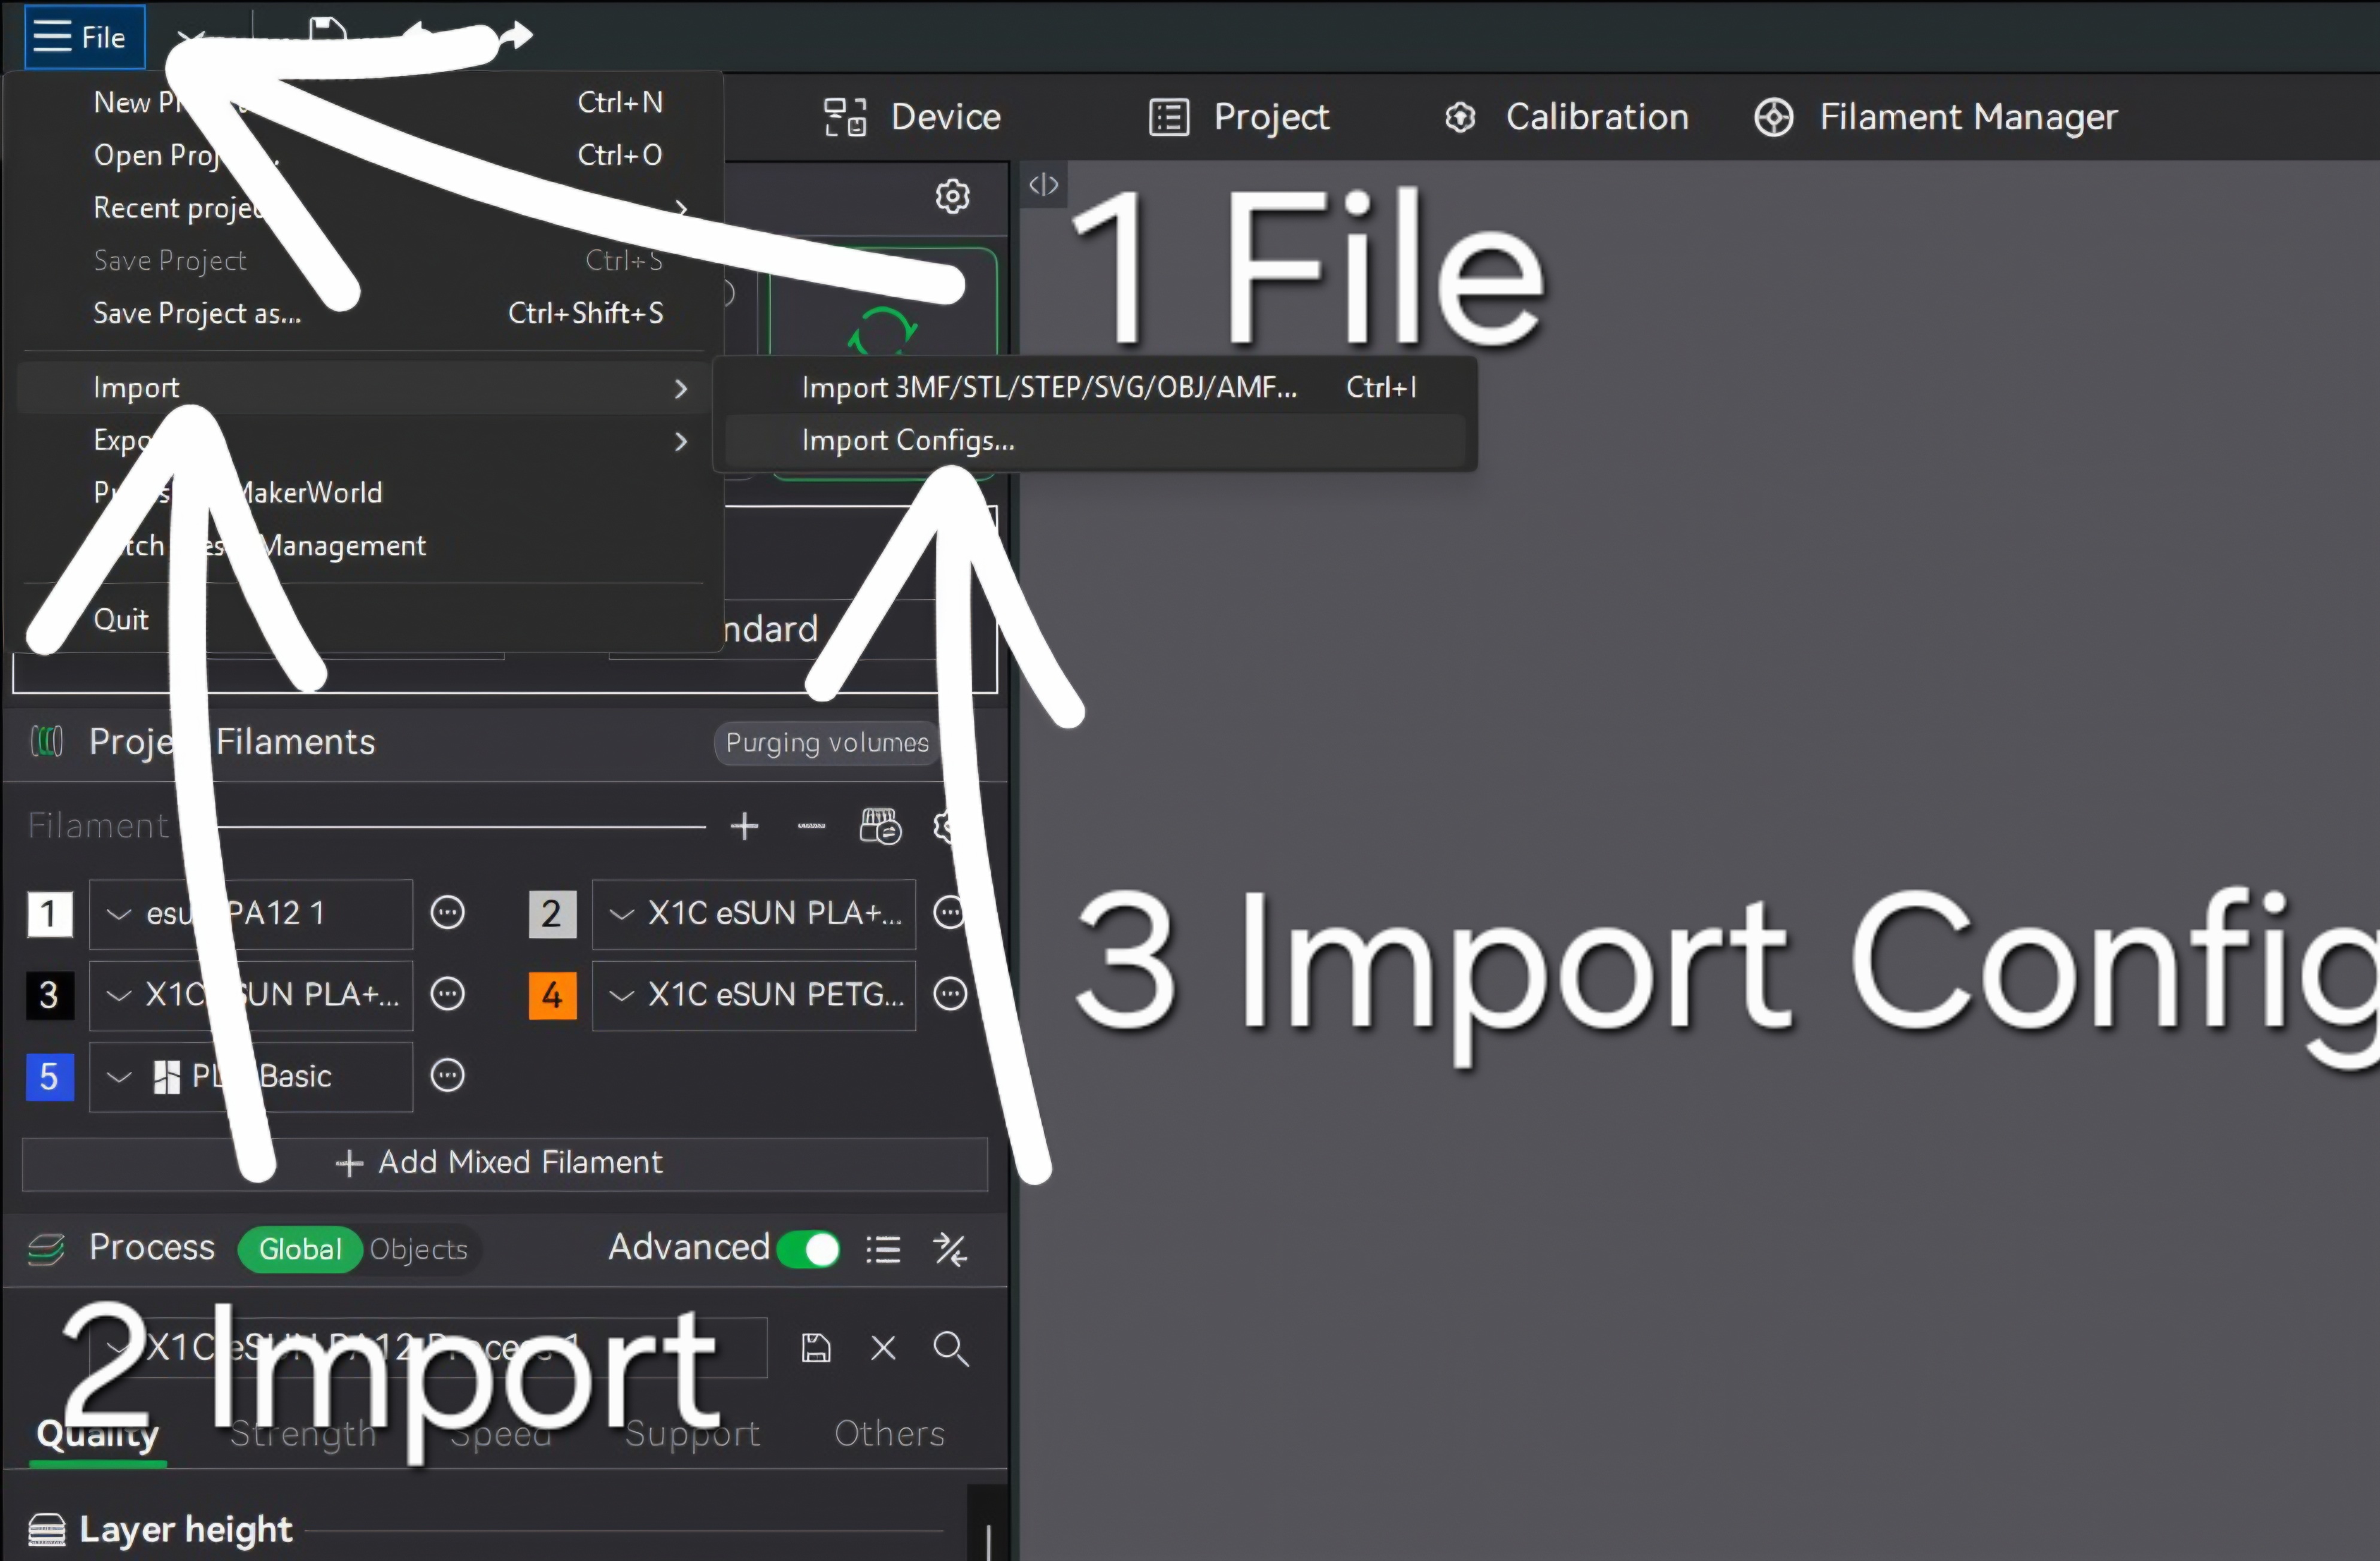
2.From the top-left menu, click File → Import → Import Configs…
Select Your Printer Model
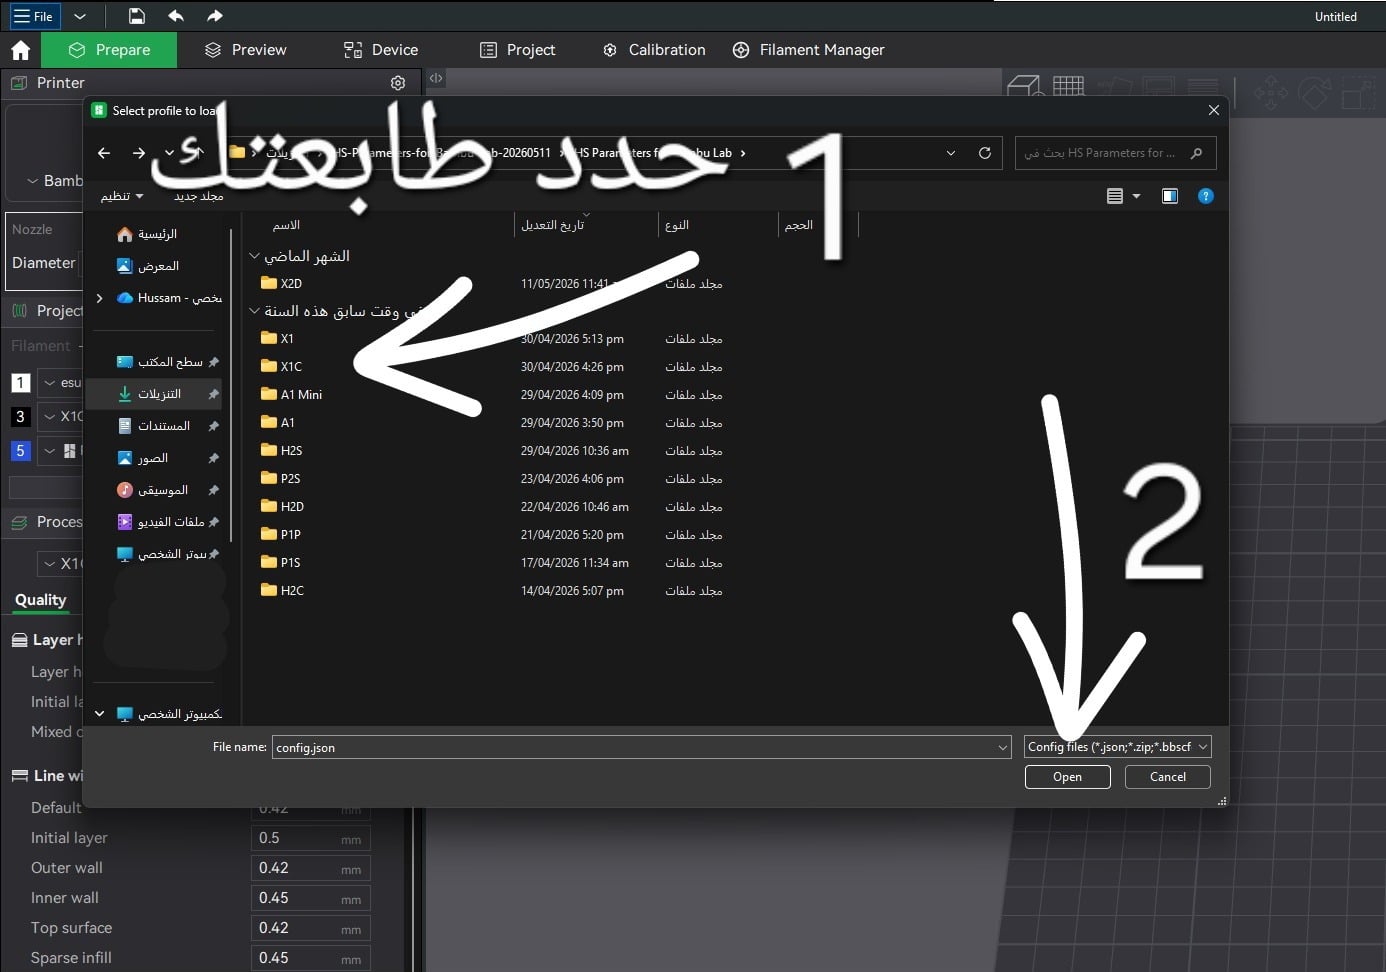
A file browser window will appear. Open the extracted folder and select the folder matching your exact printer model (e.g., X1C, P1S, A1). Click Open.
Import the JSON Profile Files
Select all configuration files inside your printer’s folder (Ctrl + A to select all). Click Open to import them into Bambu Studio.
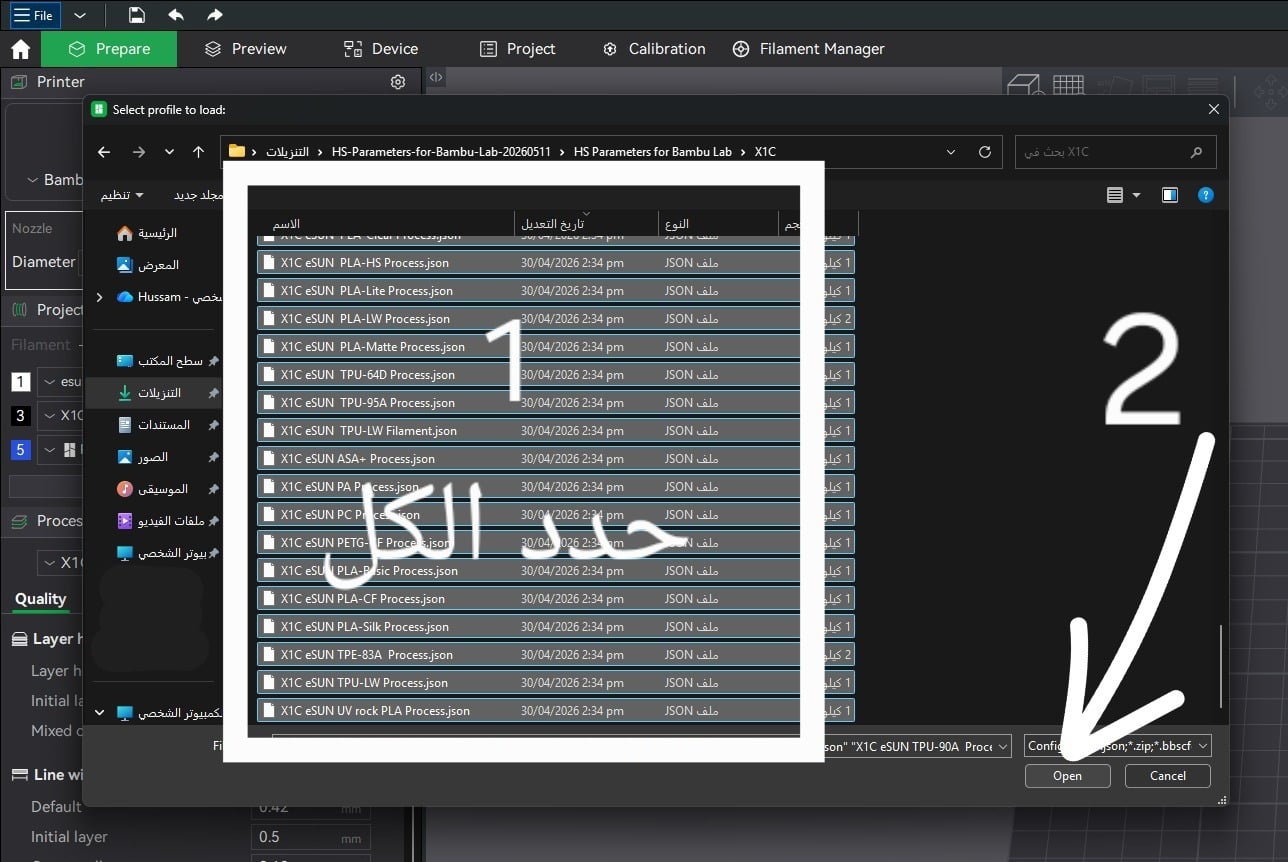
Step 3: Apply the Settings to Your Print Project
Choose the Filament Preset
In the left sidebar under Filament, click the three dots → Custom → User presets. Select the eSUN filament you want to use (e.g., X1C eSUN ABS+ Filament).
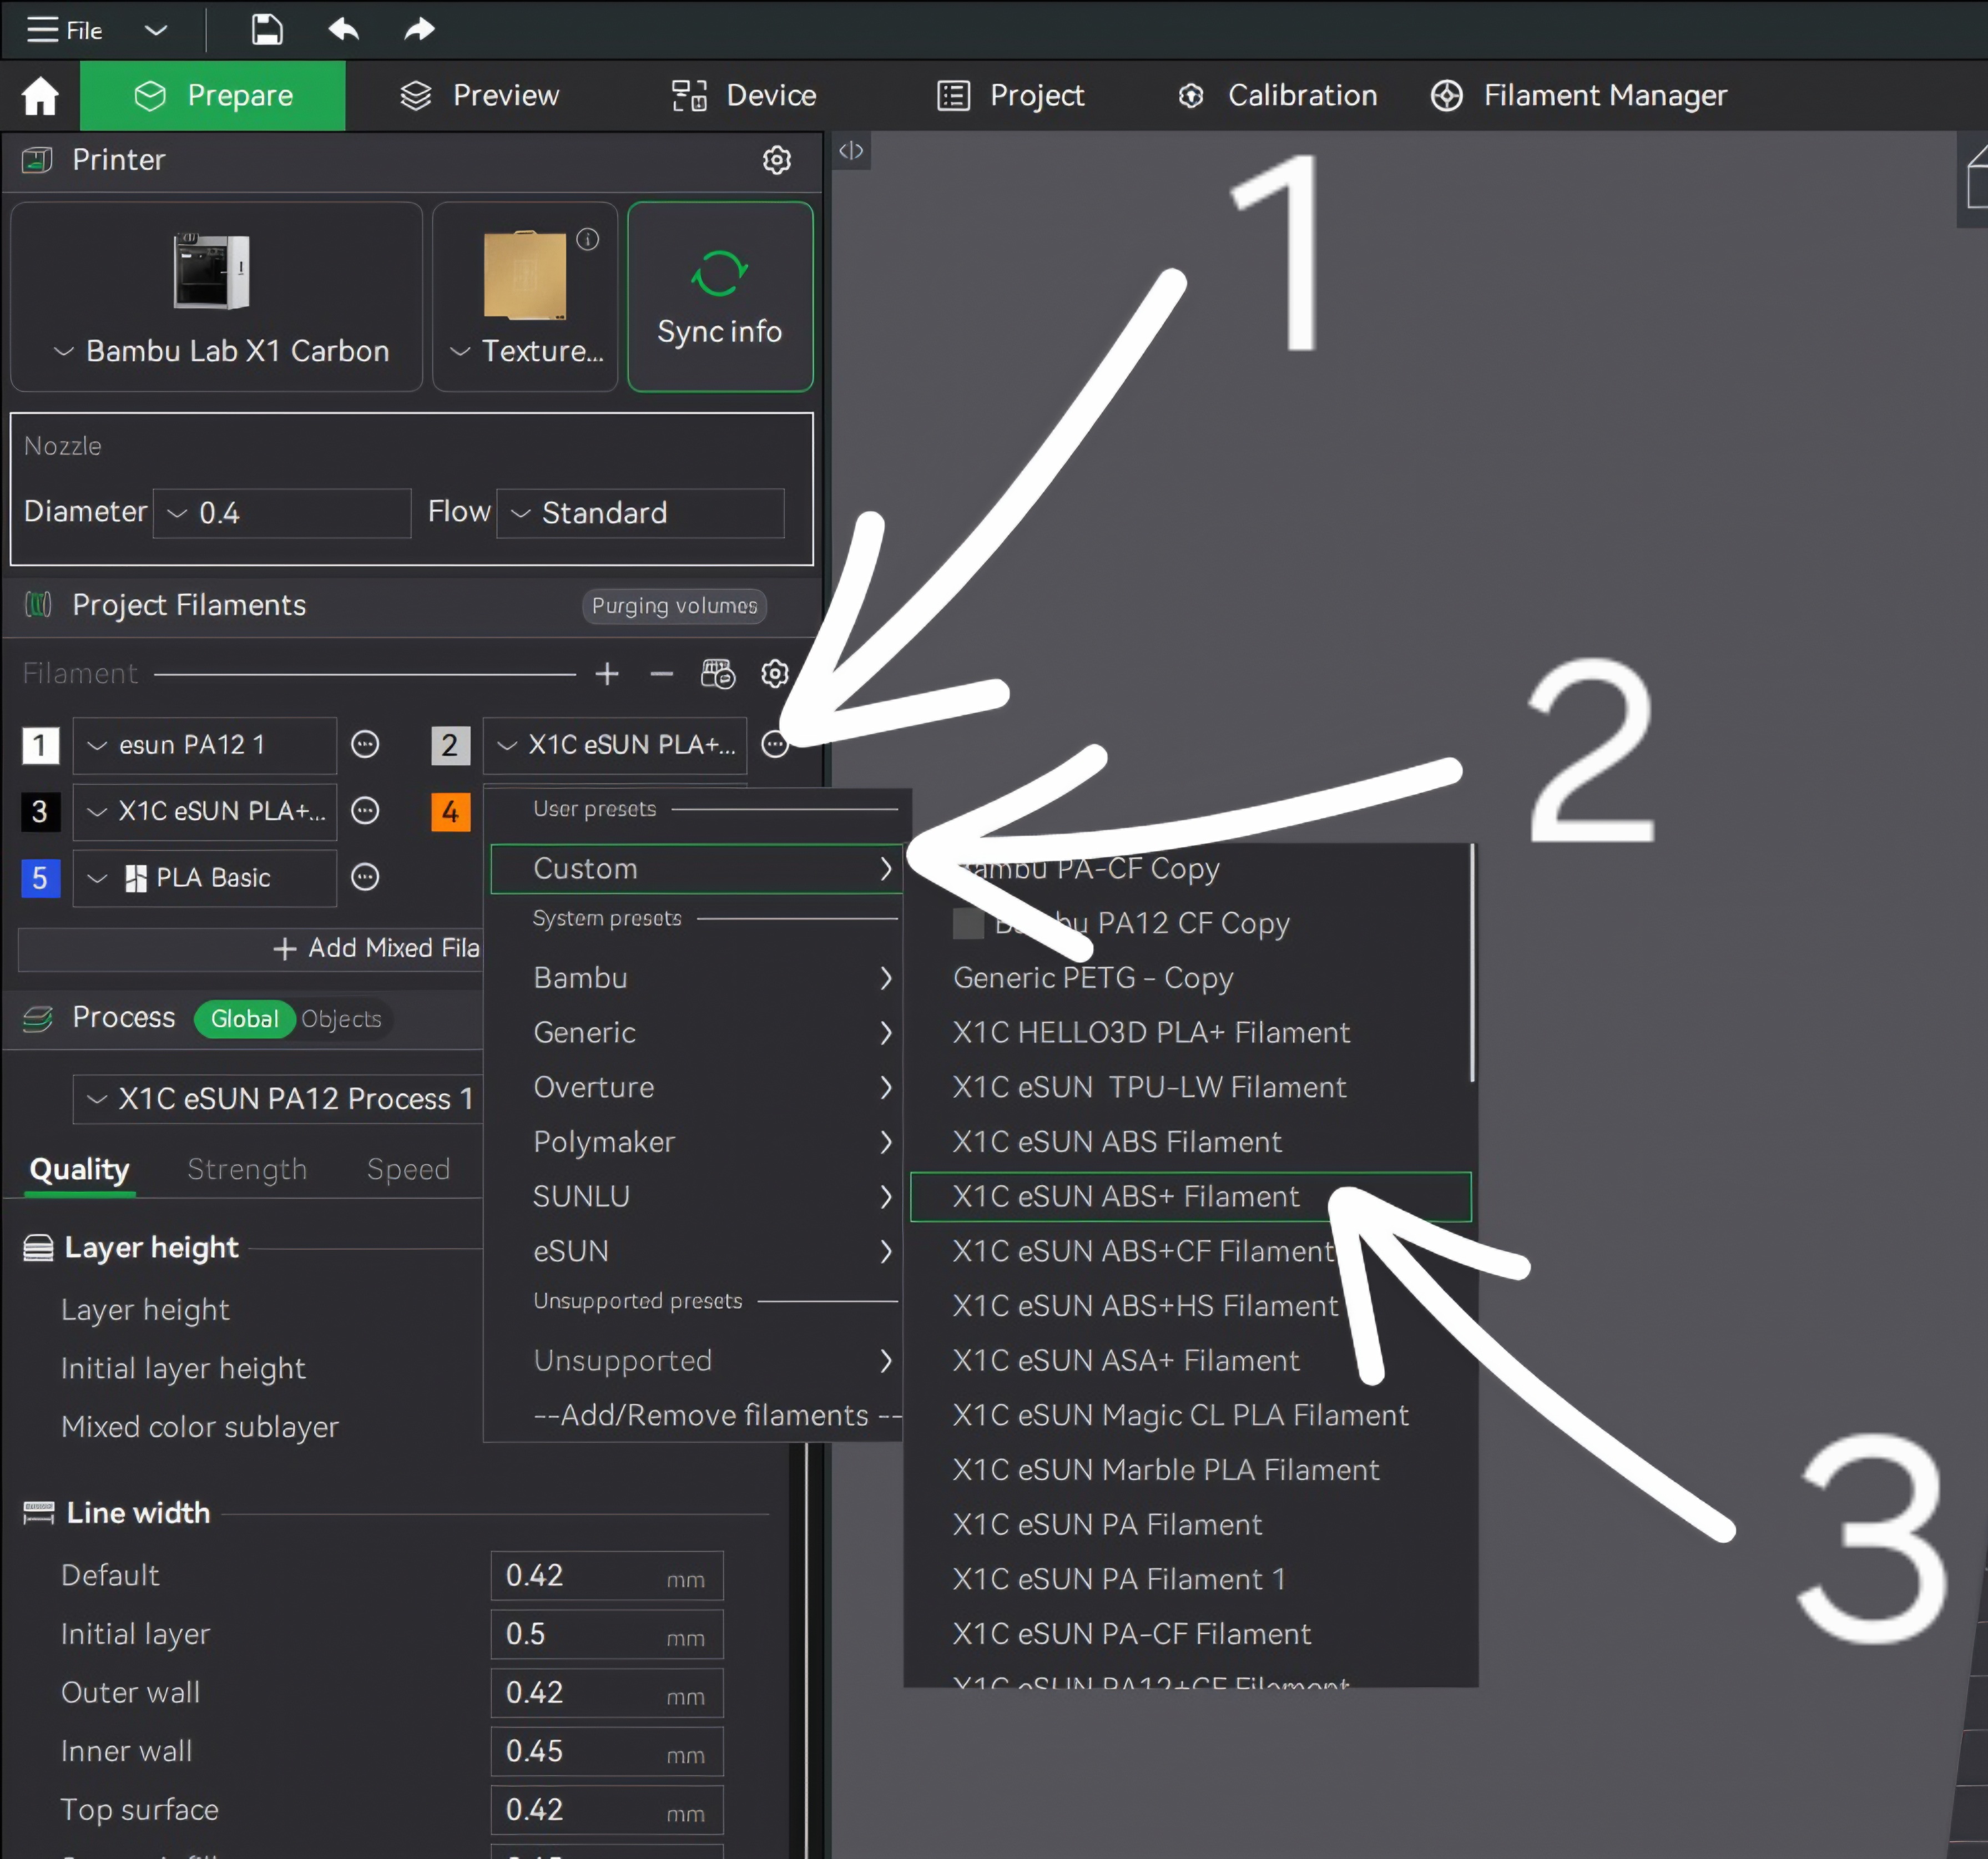
Choose the Process Preset
Under Process, open the dropdown → User presets. Select the matching process file (e.g., X1C eSUN ABS+ Process) to apply correct speeds, temperatures, and layer settings.
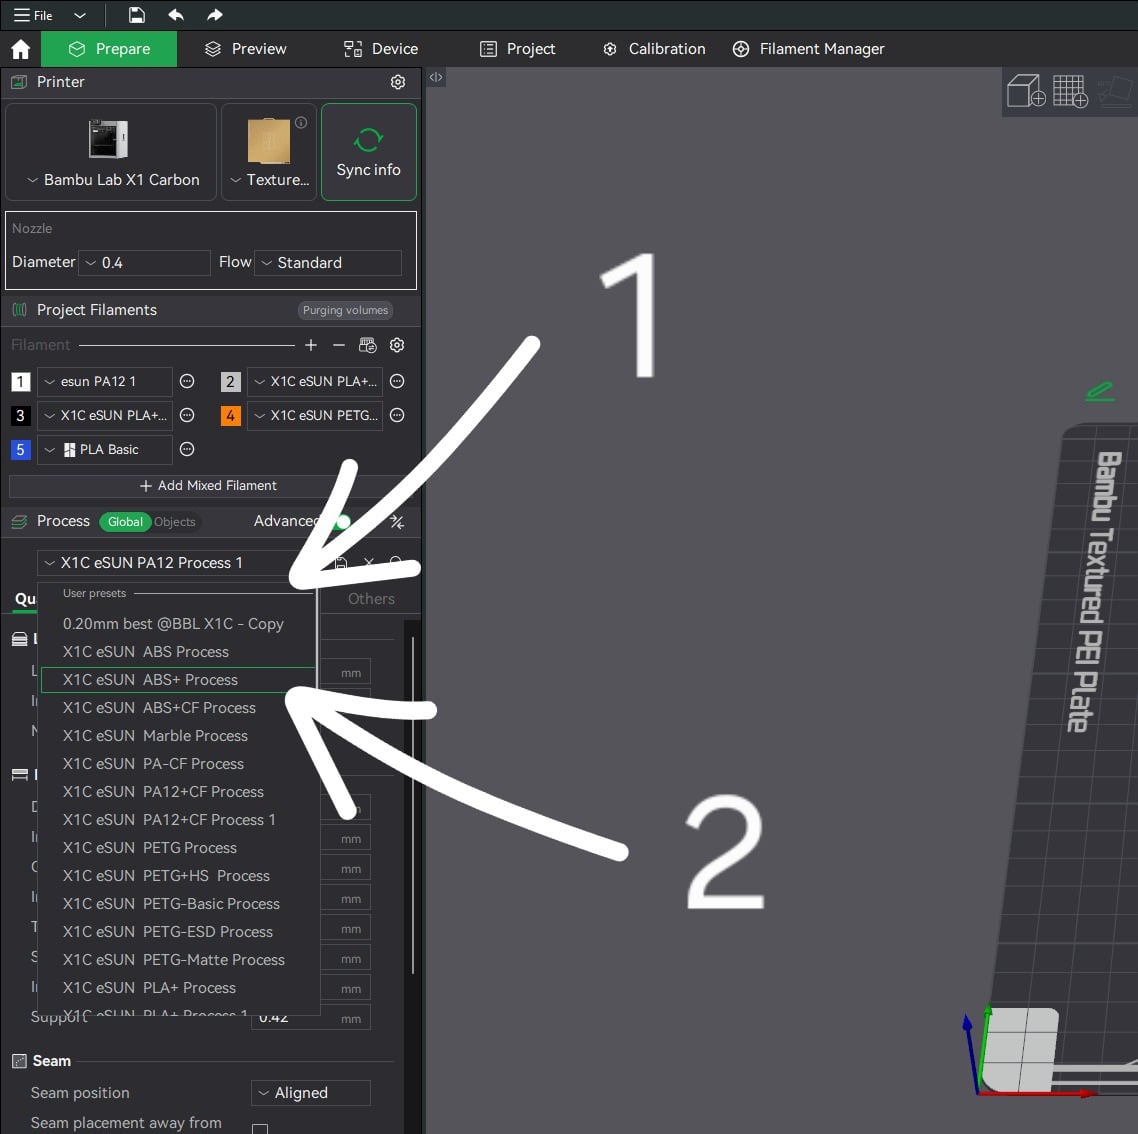
Section Two: Importing Profiles into Creality Print
Step 1: Download the Profile Files
eSUN also provides ready-made profiles for Creality printers. If your files are in .json or .ini format, they are compatible with Creality Print.
Step 2: Import Profiles into Creality Print
- Open Creality Print.
- From the top-left menu, choose: Settings → Filament Settings or Import Configurations (depending on your version).
- Click Import.
- Select the eSUN filament profile files. They will be added directly to the Filament Presets list.
🎥 Visual Guide for Creality Printers
This video demonstrates—step-by-step—how to import filament settings.
Use it as a visual reference to follow the steps accurately.
Step 3: Select Filament and Process Settings in Creality Print
After import:
Choose the Filament Type
From the Filament menu, select the imported eSUN filament.
Choose the Process Settings
From Process / Quality / Speed, select the matching profile (ABS+, PLA+, PETG, etc.).
⚠️ Important Note for Creality Printers
Always ensure you select the correct printer model inside Creality Print before applying any settings. Speed and temperature profiles vary significantly between:
- K1
- K1 Max
- Ender 3
- Ender 3 V3
- CR‑10
- and others…
Selecting the correct model ensures safe and optimal printing performance.